Install Eclipse Plugins – The Easy Way
Eclipse as of today is the industry’s major non-Microsoft software tool platform. The number of companiesadopting this platform is a testimonial of the platform’s success.
(Check my previous post for more on the history of Eclipse IDE)
Eclipse has a well-designed, and extensible architecture. What is valuable about Eclipse is that it provides an open source platform for creating an extensible integrated development environment. This platform allows anyone to build tools that integrate seamlessly with the environment and other tools.
The key to the seamless integration of tools with Eclipse is the plug-in. With the exception of a small run-time kernel, everythiPublish Postng in Eclipse is a plug-in. This means that a plug-in you develop integrates with Eclipse in exactly the same way as other plug-ins.
Any new person who is introduced to Eclipse in concerned with one important question : How to Install Eclipse Plugins ?
There are lot of useful, high quality third party plugins available and all theplugin installation instructions specify at most 2 ways to install Eclipse Plugins
Normal Ways of Installing Eclipse Plugin
I will take the Eclipse Webtools Plugin to describe the 2 “normal” ways of installing Eclipse Plugins. In the next section I will show how the same can be done in a “easy” way.
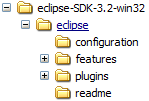
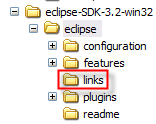
This is how the Eclipse SDK folder structure looks like:
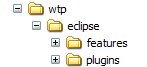
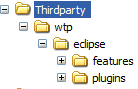
After extracting the Webtools package you have this folder hierarchy:
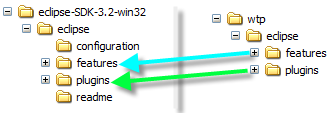
One of the common method of installing is to copy the contents of the “features” into the “features” folder of eclipse, and do the same with the “plugins” folder.
The other way of installing, which Eclipse also recommends is via the Update Manager.
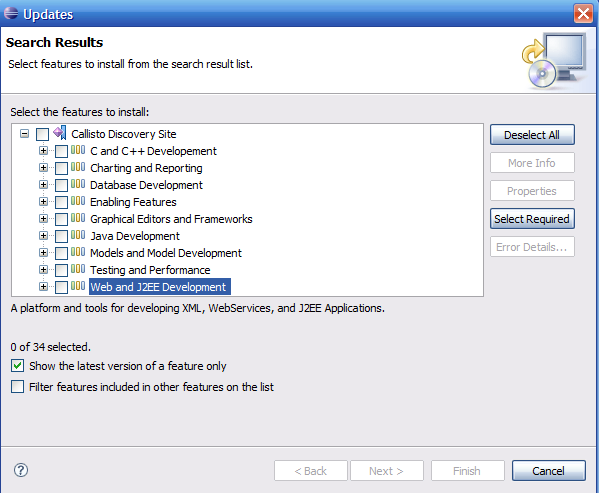
You can choose the components you wish to install, choose the dependent plugins etc. In this process, generally you select the default installation location specified by the wizard.
The advantage with this approach is that when you select a component you are also made aware of the dependent plugins that needs to be installed. For e.g. If I select Web Tools, I am also told to select/install GEF
The disadvantage with this approach is that it never works well in a low bandwidth environment. I have struggled so many times to install via update manager, somewhere its gets stuck and I am left with a partially installed, corrupted environment.
The Easy Way
Now for the “Easy” way of installing Eclipse Plugins. Very few people are aware of this concept and Eclipse somehow doesn’t seem to document this approach anywhere.
This method uses the concept of “Links”. Here is the step by step procedure. (In the explanation I have used the installation of Webtools as the example)
1. Create a folder named links inside the eclipse folder (See Picture below)
2. Create a new file inside this folder and name it as say wtp.link. Note that the file name can be any valid string, but the extension has to be link.
3. Assuming that I have copied the Web tools into D:\thirdparty as shown below,
the contents of wtp.link has to be this:
path=D:/thirdparty/wtp
Points to Note:
- The string should always start with “path=” keyword.
- The path should point to a directory which has a “eclipse” folder which in turn has “features” and “plugins” as sub-folders
- It is recommended to use forward slash ‘/’ in the path (If you want use Backslash, see that you use the escape character i.e. in Windows it should be “\”)
- The file extension should end with “link“
- The file (i.e wtp.link in our example) should exist in the “links” folder.
- It is recommended to create link files only for big plugins/applications. For small plugins you can create just one link file, say misc.link and copy all the small plugins to the path referred by this link.
Restart Eclipse and now all the plugins and feature descriptions should beread from the path referred by the “link” files.
Advantages
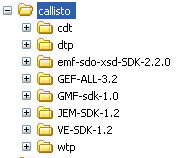
Eclipse has a lot of top level and technology projects. To experiment with these projects, the “links” concept comes to the rescue. You can extract the plugin to a “thirdparty” (or a folder of your choice) and just link it within the eclipse installation. My current configuration looks like this:
Eclipse Projects/Third Party Plugins
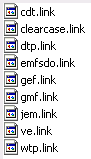
Corresponding Link files
The “Copy” approach just bloats the eclipse installation and you cannot remove/uninstall the plugin easily. With links approach, you can just remove the “link” file and the plugin is uninstalled !!
The same links directory can be used in another eclipse installation. For e.g. if you are working with Milestone or different version of Eclipse, you can just copy the links folder (containing .link files) and the plugins are installed.
It is very easy to manage different versions of a plugin. If a new version doesn’t work, reverting back to a previous version is pretty easy.
Also, if you use the update feature in Eclipse, you can choose one of the above folders as the installation directory.
Conclusion
This approach seems to work fine in both windows and linux. I am not sure why this approach is not documented in Eclipse. I found out about this when I was using the trial version of RAD (Rational Application Developer). It was used primarily to manage product extensions. I believe the same concept can be used to manage plugins (Install/Uninstall).
Using Dropins to install Eclipse plugins
One of the problems with the above “link” approach is the plugin dependency resolution. This has to be take care of manually by the plugin installer. If the install is done via the UI, it manage to find and install all the dependencies.
Staring from Eclipse 3.4, Eclipse SDK has a new provisioning system called Equinox/p2.
p2 supports the notion of watched directories and this directory a user or a script can drop “files”. Eclipse platform ships with one such default watched directory called
dropinsThe dropins folder is configured to be scanned during startup, and for changes to be immediately applied to the running system. Thus the dropins folder can be used much like the plugins directory was used in the past.
A subtle twist on old behavior here is that plug-ins and features added to the dropins folder are properly installed into the system rather than being forced in. This means p2 has an opportunity to confirm that the new plug-in doesn’t conflict with other installed plug-ins, and it can even go out and fetch any missing prerequisites of the newly dropped in plug-ins.
This also means you can later use the GUI to install extra functionality that depends on the plug-ins in the dropins folder, since p2 knows about them and can reason about their dependencies. In other words, new plug-ins installed via the dropins folder behave exactly like plug-ins installed via the user interface.
Supported dropin formats:
1. You can just drop the plugin jar in the dropins folder

2. You can also drop in the traditional Eclipse application or extension layout directly in the dropins folder

3. You can add an additional layer of folders immediately below the dropins folder that contain traditional Eclipse extensions

4. Or you can add link files as in the Eclipse links folder

Hope this post was useful, if you had any problems using this approach, do leave a comment with the problem description.